Showing posts with label Hail Caesar. Show all posts

Saturday, June 29, 2013

Hail Caesar Skirmish #12: Ambush!


"All right lads, let's practice one more time! The Romans'll be here soon. Everyone back into the forest!"

After wrapping up our quick "Cavalry vs. Infantry" scenario, we had just enough time to run a second scenario. For our second match we chose "Ambush" from the classic Table Top Teasers. A quick report of a Celtic ambush of a Roman column after the jump.


Roman column blissfully unaware of the impending ambush


Luckily, "Ambush" uses quite a bit of the same terrain as "Cavalry vs. Infantry", so we shifted our terrain features about and deployed the Roman column according to the scenario. Two Roman cohorts and Cretan archers closely escorted a Roman wagon, with a VIP standing in for the scenario's original princess. Two Numidian light cavalry elements took the very forward and rear positions. The Romans needed to march their wagon and VIP to the river ford, allowing them to escape to the north.


The Celts were slightly outnumbered (having a unit of slingers, a warband, a cavalry unit and a small unit of archers), but could deploy in any terrain feature. We modified the rules slightly from the original scenario, allowing any units in the rough ground or eastern forest to be detected on a roll of 5 or 6 as the Roman column was already close enough for scouts to spot them. Units in the other terrain feature would require a successful order to reveal themselves, with additional orders allowing them to move.

As for the wagon train and VIP, we decided they'd be captured after being contacted by an enemy unit (in hindsight, we should have used the stats for wagons in the Hail Caesar rules, but their existence slipped our minds at the time).

Since the Celts would be ambushing, my Roman opponent Mike let me have the first round. I revealed a warband in the rough ground, charged and contacted the wagon train.

"Wait," we both said, "that's lame. Let's play again."

For our second attempt we removed the rough terrain as an option for hiding troops, reset all the figures and started over.

The Celts Sound the Attack

Celts launch their ambush

Repositioned to give the Romans a fighting chance, the Celts let loose their bloodthirsty howls and emerged from the woods. The requirement of spending a single successful order forming up at the edge of the forests restricted the barbarians from charging the Romans while they were vulnerable. I didn't roll more than a single order for any of my troops, and actually failed to get my archers out of hiding.

Celt slingers pepper enemy infantry with stones


The celt slingers were in range of the wagon train though and unleashed a fusillade of stones against their helpless latin foes.

Though spread thin, I was feeling confident that I had managed to surround my enemy and could prevent a simple flight to the ford (a real danger if the wagon or VIP rolled three successful orders).


Romans Fall in Line

The Romans deployed into a defensive line, seeking to blunt the thrust of the cavalry and skirmishers who were poised to charge next turn.

Romans deploy to protect the wagon train


Close enough to unleash missile weapons, the Romans dealt and astounding amount of damage to the slingers who rolled a 3 on their subsequent break test and were wiped out.

"The horror. The horror."

My confidence began to waver. I had missed the opportunity to deal a large amount of damage with my smaller force while the Romans were still in their vulnerable column formation.

Celts trying to reach the battle


With the rough ground and great distance from my other forces protecting his flank, Mike's Romans were free to apply their full force to my cavalry. He moved one heavy infantry unit back, close to being broken after suffering under the initial attack by my slingers. As initiative passed back to me I decided to gamble everything on a charge to his center, with my general throwing his full weight into the battle.

The cavalry tries to break the Roman center

All In


As I charged his infantry, Mike took advantage of the rule that allows formed cavalry to countercharge join the battle.

The celt general urges his troops on

My cavalry managed to survive the initial battle, even being flanked. On the subsequent round, Mike's general also joined the fray. In the resulting bloodbath, my cavalry still managed to hold on but were broken, but my general met a glorious but tragic end.

With two units mauled, my general defeated and dinner time approaching we decided the Romans had staved off the Celtic ambush. The barbarian general was packed up and shipped back to Italy for his inevitable parade and execution during a triumph.

Ignominious defeat

What Did We Learn?

Converting the Table Top Teasers to Hail Caesar requires a little bit more finesse than I think we initially appreciated. The variable move distance (varying between 0 and 18" for infantry for example) means that distance by itself can't be used to govern game length. The river ford and ambush positions feel extremely close in this scenario, potentially ending the game before it begins.

Allowing the wagon and VIP to use the stats (rather than being instantly captured upon contact) would have given them more resilience  and limiting them to single moves would have prevented them from skittering off the board on the first turn.


The ambushing forces are also purposely outnumbered in the scenario, but because they are spread out they can't take advantage of supporting each other, further weakening them. The Romans on the other hand can lock up into a defensible line, using the river and rough ground to protect their flanks.

I'll have to think on this a bit more, but giving the Celts only skirmishers and more terrain might allow them to strike and slip back before the heavier roman infantry can pursue. Even with equal forces, the Celts will take a beating if they get into a stand up fight with formed infantry, but could prove frustrating for the Roman player. After losing (yet again) I might not mind too much some Roman fuming!

Saturday, June 22, 2013

Hail Caesar Skirmish #11: Infantry vs. Cavalry. Kind of.


"Hey, for our Hail Caesar game tomorrow, let's do something different this time" my gaming pal Mike said, "Not just a line 'em up bash."

No problem. I'd been looking forward to trying a Table Top Teaser and this seemed a great chance to shake things up with a new scenario. I flipped through the collection to find something suitable, which proved a bit challenging as most seemed to work better for more modern armies (Horse and Musket or later), or required a ton of cavalry or terrain. I finally settled on "Infantry vs. Cavalry" and "Ambush". Check out our battle report for Cavalry Attack after the jump.


I didn't have nearly enough cavalry to run cavalry attack, but quickly finished up a small unit of Numidian cavalry (please excuse the block painting and unfinished bases) and tried converting the suggested forces to figures I had on hand. The terrain also needed some modification as well, but the vital hills, river and layout were close enough to work.

Romans (RED) 

The Romans in column formation

The Romans begin the game in column, marching along a river when they are surprised by a (mostly) cavalry force. We set up the Romans according to the scenario map, two cohorts per side, with Cretan archers in the middle, all in column formation.
The Romans begin nearly in the middle of the table, with a series of hills and rough ground to the north that will provide an escape from the cavalry attackers. Should they manage to reach the rough ground, the Romans will win the scenario.

Celts & Allies (BLUE) 

The celtic cavalry prepares to launch their attack.

The Celts are free to set up along the western table edge in an angled deployment zone. As the Celts, I placed my two light cavalry and one heavy cavalry towards the north, ready to dash across the table and cut off the Roman retreat to the north. Two warbands and a Spanish medium infantry unit took the southern half of the deployment zone, with a small unit of celt slingers just in front of them.

Initial deployment

Opening Moves

The Celts, springing their trap, received the first initiative. I ordered my cavalry to charge, one small unit swinging north to stall any Roman advance to the protected ground to the north, with the rest of the cavalry charging straight ahead to engage the boys from the boot as quickly as possible.

I rolled well, getting my cavalry into position, but failing to engage the Romans in combat. The rest of my infantry moved along the river, but remained beyond javelin range.
Light cavalry swing north to cut off escape to the hills


The main body surges towards the Romans, but not yet reaching javelin range.

With initiative passing to the Romans, my opponent Mike realized he needed to get his Romans out of march and into a defensive position. A lengthy discussion occurred in which Mike I negotiated the sophisticated maneuvers he wanted his tiny lead men to engage in, while I asked him to reconsider the complexity of his commands for something a little simpler. After quite a bit of back and forth, his troops finally fell into a crescent formation, one side facing the onrushing enemies, the other facing the river to prevent a flank attack.

Romans unfurl into a broad crescent

Neither of us were quite sure of the legality of the maneuver  but in an effort to get back to the game, we decided it was good enough and got on with it. The Romans loosed sporadic ranged attacks, but dealt few casualties.

Cavalry Charge

Having failed to take advantage of the Romans initial vulnerable position, I had to console myself with the fact that they had to drop into a defensive position rather than simply making for the hills. Feeling confident, I went for broke, charging my warbands towards the Roman line which evaded back out of the way. Of course, this is totally illegal since they are close order infantry, but neither Mike nor myself caught that rule in the moment.

Romans deploy Kirk's Kobayashi Maru maneuver to get out of a jam.
On the other side of the line, my medium cavalry supported by light Numidian cavalry crashed into the Roman line.
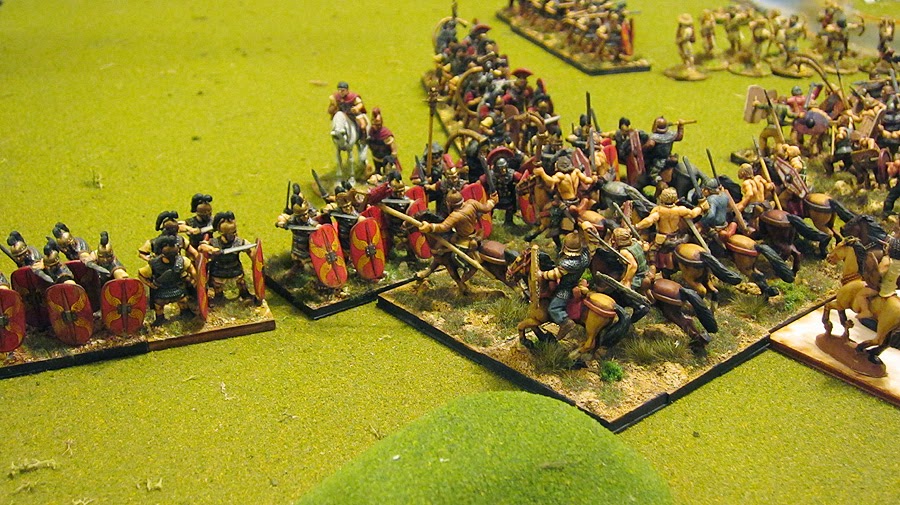
Celts attack, with Numidians in support


But after a horrendous round of combat, were forced to recoil!

Forced to flee! This is what I get for putting figures with unfinished bases into play.
Having rebuffed the Celtic attack, the Romans see an opportunity to deal some damage.

The Late Republic Strikes Back

The Roman left which had just evaded, charges the warbands, completely obliterating them. Their defeat was so quick the only evidence that remains is this pic of the victorious Romans, bloodied and disordered, but still in the fight.

Without celts in proximity, Romans collapse into a stout defensive configuration


Having been dealt a serious blow, I felt I need to attack. On the Carthaginian initiative I sent my medium infantry into support another cavalry charge and ordered the advance.

One last charge

Again the two lines collided and again my cavalry performed miserably, routing off the table following a dismal 3 on the break test. With three out of six units routed, and finally realizing that formed infantry can't evade along I decided to concede the game. There was little hope to stopping the Roman juggernaut with only light troops remaining.

Had I not been so eager to come to blows, or realized that I didn't have quite the numerical advantage I thought I had, I would have proceeded more cautiously and perhaps made a better showing. Also, I love Hail Caesar, but it could really use a proper glossary and index to help quickly find rules questions. Still we had fun, and since the first game went by rather quickly, we decided to try out the other Table Top Teaser, "Ambush". That write up will need to wait for another time though.


Friday, June 7, 2013

Hail Caesar Skirmish #10: Battle at the Pig Farm


It was obvious when I got home from work that I was having a crummy day. After dinner, we washed up, I got my son ready for bed and tucked him in. I clomped back downstairs and out of the corner of my eye caught a glimpse of our kitchen table set up with a pair of armies facing off across a forest clearing.

My wife smiled sheepishly. "I think you'd feel better if we played a game." It was true, my mood did a quick 180 as we settled in to a surprise game of Hail Caesar. My wife GMs her first Hail Caesar game after the jump.


Roman Briefing (as conveyed to me) 


"Ok, so these Romans got cut off from their legion. They're trying to get back, but they've been disgraced by fleeing their last battle. Also they are starving. So they want to get these pigs to eat, and also to wipe these barbarians out. They can't return to their legion without killing these guys or they'll wind up looking like chumps."

Celt Briefing


 "These pig farmers see all the Romans coming and are all 'Yull nevar tehk owr PEEGS!' Also, see this woodland clearing over here? That's where they do their tribal dances, so obviously they don't want the Romans tromping through there. (These pigs are the cutest.)"

The deployment was set when I sat down at the table, taking command of the Romans. Their four units of heavy infantry were in two ranks behind a river snaking its way across the table. A small unit of Numidian cavalry and some Cretan archers held my left flank. A hill on the far side of the river looked like a good place to set these lighter forces up while my infantry crossed the river.

The Celts were massing behind a narrow passage between some rough ground and the edge of the wood. Their skirmishers armed with slings lurked on their right flank within the wood, while a unit of celtic cavalry was formed up within a turnip patch on their left flank, with only some brush before them.


The Roman plan was to get across the difficult river crossing first, charging forward to plug the celt warbands up in the gap between the wood and rough ground. This would prevent them deploying into a full line in the open ground at the center of the table.

The Celts (I later learned) intended to hold the main Roman line with two warnand units so the other two could roll up the flank. The skirmishers would sneak through the woods into the Roman rear to finally pepper them with stones once the lines had clashed.

Terrain: The Third Antagonist

Both armies were forced to deal with challenging terrain. As the Romans, I started by sending my light cavalry and archers across the river to the hill on the far side. We decided the river would take three actions to move across (move up to it, cross, consolidate on the far side), and luckily my light troops rolled three moves. The heavy infantry wasn't so lucky, only able to move up the river before passing initiative to the Celts.

Cretan archers set up on a strategic hill

Heavy infantry "wading" across the small river.

The Celts were in a tough position as well. They moved their cavalry into the scrub on their left flank, but the skirmishers made little progress through the woods on their right.

Cavalry switches to open order to manage the scrub land.

The warbands, with their larger base size and a narrow gap between the woods and rough ground could only manage to wriggle a single stand through initially.


Depending on Numidians


With my infantry stalled in the river, and seeing the Celt cavalry moving into my flank, I was concerned  my heavy infantry would be hit in the side as soon as they crossed the river. The only hope I had of protecting them was to send my Numidians into hand to hand combat with the tougher Celtic cavalry to buy me some time.

I ordered the Numidians into close order and gave them a charge order directly at the Celts. My wife and I discussed charge responses and she decided to countercharge. My Numidians were likely to get stomped, but by countercharging the two cavalry units met at the midway point between them. Directly in front of my Roman heavy infantry.

The dice swung my way and I was able to send my Romans the rest of the way across the river and into contact with the flank of the Celt cavalry.

Celtic cavalry caught after a rash countercharge

In the ensuing battle the Numidians managed to push the Celt cavalry back and pursued them to protect the Roman right flank as long as possible. The Romans consolidated and eyed the approaching warbands across the narrow plain.


Warband Plans

The Celts skirmishers continued to slink along the edge of the woods, while the warbands moved into the clearing and arrayed themselves in a shallow V formation.


Seeing the warbands getting into position, and not wanting to be on the receiving end of a fully prepared barbarian rush, I decided to risk a full charge.


I extended my line, leaving a double depth of heavy infantry on the side likely to take a hit to the flank, and charged forward. The Celts again responded with a countercharge of their own, and unfortunately wound up facing Romans who were fighting atop the hill on the Roman left. I was totally going to let her take it back, but she felt she needed to stop the Romans in the center of the clearing to give her other warbands who hadn't made contact yet room to maneuver.


In the clash the Celts took a beating but in managed to hold on during their break tests. The cavalry skirmish between the Numidians and Celts continued, but both sides became Shaken and were forced to retire.


Now the Celts could bring the rest of their warbands to bear. Unable to get to the Roman flank, the barbarians were able to double up and hit the Roman right. Desperate to score a victory, the Celt leader joined the melee. In the ensuing battle the Celts were able to push the Roman right flank back...


but in the center the Romans persevered against the already bloodied Celts and managed to shatter them. The Roman center used their Move by Victorious Units to swing into the flank of the fresh barbarians.

The Roman center breaks through and swings right, flanking the Celts on the Roman right.

The furious battle also claimed the life of the Chief Pig Farmer. With more than half of their units Shaken or routed, and their general dead. The Pig Farmers fled the field of battle.

"They may take our lives... but they'll never take our PULLED PORK!"

Wrapping Up

This was another of our small "skirmishes" using only a single division per side this time, but even at this level Hail Caesar is fun. I'm also feeling more comfortable with the rules, even making some rulings on the fly rather than look them up to keep the game flowing.

I still feel like I need a few more units and command stands to get up to the three divisions per side HC recommends, and I'm looking forward to creating some historical scenarios, or some more interesting confrontations based on the old Table Top Teasers.

We're moving house this month and into temporary accommodations until our new home is built. I'm hoping to sneak in one more Hail Caesar game before the move, because in the interim I'll have to be content with painting as most of my game stuff will be in storage. But once we move I should be able to get a new game table, camera, actual lighting rigs, and plenty of time and space to extend my terrain collection. Can't wait!

Wednesday, May 29, 2013

Unique Commander Qualities for Hail Caesar


I was reading a thread on TMP that requested a set of ancient rules that included (among other things) variable generals. Many people suggested Hail Caesar, but it was pointed out that generals in Hail Caesar are all cut from the same cloth, barring their command value.

Commanders in Hail Caesar only have a few game rules associated with them that might be altered, but with a little bit of tweaking I think there are a lot of possibilities in bringing a unique flavor to individual generals. The Hail Caesar rules already have a few suggestions:

  • Command Rating: The number under which the command dice must be rolled to issue a command. Typically 8. Vary it by +/- 1 to customize the commander. 
  • Combat Ability: Maximum number of dice a commander can roll in combat. Typically 3. Increase or decrease the maximum number of combat dice, up to 6 dice for a legend such as Alexander the Great.

There are a few other inherent numbers associated with commanders that could be changed for variety: 
  • Command Distance: How far away a unit must be before suffering penalties to the command roll. The standard command radius is 12", but this could be adjusted by say +/- 3" to represent a commander with especially well or ill trained runners or communication system. 
  • Survivability: After concluding combat in which the commander was attached to an engaged unit, 2d6 are rolled to determine if the commander is hit in the melee, with an additional 1d6 rolled to determine whether he is wounded or slain. Grant the commander a chance to reroll one of the 2d6 (perhaps once per game), or to gain a +/-1 to the following 1d6 roll to represent either a particular hardy or weak warrior.

Commanders also receive a few special actions to help their divisions, Rally! and Follow Me! Both of these could be modified by allowing the commander to roll three dice rather than the usual two, taking either the two best (or alternately two worst) dice for the result, representing commanders who are either particularly charismatic or hated. If that's too fiddly, simply give the commander a bonus or penalty to their command rating when issuing a Rally! or Follow Me! order.

Finally, just as units receive unique special abilities, the same could be applied to commanders. A Wild barbarian general might be able to reroll the dice he adds to the first combat he engages in. A Tough Roman commander might get to reroll one of his combat dice each turn.

Want to randomly generate the quality of your army leader before the battle? Roll a pair of d6, one assigned to the general's positive qualities, and one to his negative qualities. If the you rolled a double, the general has no special qualities, otherwise consult the chart below:


Positive DieQuality
1Pious: Once per game, re-roll one of the two command dice. The new roll stands, even if the result is worse than the former roll. 
2Stern: The commander suffers distance penalties when issuing commands to units beyond 15" (rather than 12")
3Orator: Roll 3d6 discard the highest die when issuing a Rally! command.  
4Charismatic: Roll 3d6, discard the highest die when issuing a Follow Me! command.
5Warrior: Only slain on a 1 or 2 (rather than 1-3) when determining fate after being hit in combat.
6Fierce: Roll the general's combat dice separately from the unit he is attached to. Once per game, re-roll any of the general's misses. 


Negative DieQuality
1Drunkard: May not use the general's re-roll ability to re-roll a blunder. 
2Undisciplined: The general suffers distance penalties when issuing commands to units beyond 9" (rather than 12")
3Not One for Speeches: Roll 3d6, discard the lowest die when issuing a Rally! command.
4Coward: Roll 3d6, discard the lowest die when issuing a Follow Me! command.
5Ill Health: Slain on a 1-4 when determining fate after being hit in combat. 
6No Taste for Blood: Roll the general's combat dice separately from the unit he is attached to. For each die that is a miss, reduce the maximum number of dice the general can roll by 1 in future combats.


These aren't tested, and might be too fiddly in practice, but I thought there might be something there worth trying.

Tuesday, April 16, 2013

Hail Caesar Skirmish #9: Won By the Razor's Edge


With my Carthaginians, Spanish and new leaders painted up it was time to get them on the table and see how they'd do. With Historicon fast approaching and another friend of mine joining us at the convention this year, I wanted to give him an intro to the rules in case we were able to get into a game together. A long time 40K and fantasy player, this would be one of his first exposures to historical wargaming. All the bloody details on a very close game after the jump.

Preparations

I modified a few of the unit cards available from Inevitable Spark
to help explain the game to our newbie. They worked great!

With both Libyan spearmen and Spanish scutarii on the table we used the Carthaginian list rather than the Gallic or Early German from our previous battles. I'm slowly inching towards a pair of opposing Punic forces, but for today's match up Hannibal's warriors would be facing the legions of the Late Roman  Republic. Non-historical, I know.

The Carthaginians were split into two divisions. I took the right, with the Libyan spearmen holding the center, supported by the Spanish scutarii. A band of celt slingers screened them, ready to fall back behind friendly lines once battle was met. A single celt warband lay in reserve behind some trees on our  extreme right.

The left Carthaginian division was being run by our newbie, M.C. His three celt warbands formed our main battle line, with his medium celt cavalry on the left flank in reserve. Our plan was to hit heavy on the left, while defending our right flank.

My usual opponent Mike took the Romans, but with the battle tipped in favor of the Carthaginians due to the addition of several new units he fell into a defensive position. His six legions formed up in testudo, four of them on a pair of hills on his left and right. He held his center with the infamous Cretan archers, who have yet to last more than a turn on the battlefield. His small group of Numidian cavalry held his right flank, facing off against the celt cavalry across the field.


The Battle Begins

The Carthaginians began by moving cautiously forward. The most efficient manner of doing this would have been for the army commander to give an order to both divisions, but we refrained from doing so to  allow M.C a chance to get some experience with issuing orders and rolling command dice. The celts surged forward, but my right flank lagged slightly behind.

Libyans and Spanish fall behind as the celts on the left flank surge forward.
Most frustratingly, the celt cavalry misunderstood their commands (no doubt hailing from some distant tribe who had trouble understanding Hannibal's orders) and failed to move for three turns.

"You think we're supposed to go with them?" "Naw, little fella said "Move yer ass", but we ride horse, not donkey."

The celt slingers exchanged missile fire with the opposing Cretan archers, but found the Roman testudo formation impervious to their attacks (the Romans normally receive a 4+ armor save on a d6. While in testudo they receive an additional +2 bonus to morale saves vs. missile fire, meaning they shrugged off any hits as long as they didn't roll a 1!)


  Noticing my slingers inflict a -1 penalty to morale saves at close range (less than 6"), I decided to be a bit more aggressive. Our battle lines were approaching (the celts were now just outside of javelin range on our left. I moved the slingers up into short range to threaten the Romans, despite their cowardly turtle formation. Finally striking a blow to one of the Roman units, and having suffered a number of poor rolls in missile fire, our Roman opponent was beginning to look a bit worried. So confident were we that M.C. and I agreed to redeploy the warband from my reserve to bolster his charge on our left. Mike, realizing we'd be hammering his right flank, decided he'd need to strike now to avoid the Carthaginians picking him apart at our leisure.

Slingers move up to deliver short range bullets to those stubborn Roman noggins.
One more shove and those Numidians
would be off the table.

The Roman Panic


Finally our celt cavalry finished sacrificing their goat, and seeing good omens in its entrails, decided to join the battle. They raced along the riverbank having rolled a triple move. In response, the Numidian cavalry countercharged. The horses met in a bloody clash, the Numidians thrown back to the rear edge of the battlefield with the celts following to maintain contact.

The celt warbands struck, but the Romans pulled out a crafty rule we hadn't used yet. Those Romans defending the hilltop used "Close Ranks" to gain a +1 to morale saves at the penalty of -1 to attacks. One Roman unit without a hill to defend countercharged his attackers. The battle lines clashed, with the barbarian hordes rolling 9 dice vs the Roman 7. The goat omens were indeed good for the celts, as very poor dice rolls continued to plague the legions. Though they hung on, the Roman right was severely bloodied, with a unit of cavalry behind their lines ready to finish off the Numidians and preparing to hit the Romans in the rear.

"Hold on fellas! We're almost there!" The celt reserve rushes to support the clashing lines.

Desperate, Mike threw his remaining Romans into battle. With the reserve warband still making its way towards the battle on the left flank, the Romans were able to scare the celt slingers back behind the Libyan line and wrap a single unit around the flank of the Spanish.


"Guys, I think this is over," Mike observed. "Can I just concede? These frickin' dice!"

M.C. and I have a long history of losing to Mike across many, many games. "Quit  yer whining," M.C. suggested, "We're going to beat you now."

From the Jaws of Victory...


The Romans had one round left. They attacked wherever they were engaged. They lost a unit in battle with the Libyans, but the Numidian horse held on, and in the great bloodbath on the left flank their luck turned. The celts, having spent their energy in the initial clash were now rolling 6 dice against the Roman 7.  The Romans lost one unit, but eked out a 1 or 2 point margins of victory in the other clashes, forcing break tests for those celt units. The celt gods showed their displeasure, the 2d6 break tests turning up snake eyes. The celt left collapsed, bloodied Roman legions breaking through, rolling the line or charging into the reserve warband.

As the turn passed back the Carthaginians we counted up the broken units. An army is defeated once half of its units (not counting light cavalry or skirmishers) are broken. As it stood, the next army to lose a single unit would be defeated. With the celts on the left destroyed, it fell to the Spanish. They were engaged to their front again a Roman legion supported by the Cretan archers. Another Roman legion were attacking the Spanish flank.


We threw everything we could into the Spanish. The Libyans couldn't flank the Romans, and chasing the Cretan archers would do no good, so they stayed in support, adding their 3 dice to the Spanish. The celt slingers moved up to support the Spanish as well, giving them a grand total of 11 dice. We rolled... garbage. 1s and 2s and 3s. The Romans won the combat by a wide margin, forcing a break test at -5, which resulted in destruction for the Spanish.

Sigh.

What Did We Learn?


  • Testudo really is good against missile fire. I think the testudo should require an order to switch formations in order to charge, but the rules are explicit that testudos can do everything a normal Roman unit in battle formation can.
  • "Close Ranks" is great for blunting the initial warband charge.
  • Libyan spearmen are awesome at defending. I probably should have had them anchor my extreme flank. That 3 dice in support are also impressive. I need some more to get them into deep pike blocks.
  • Reserves are essential, not only for plugging gaps or defending flanks, but for applying pressure on weak parts of the enemy line. We haven't had enough units until now to make use of reserves but I expect that to change as I get more figures painted up.
  • Coordinating two divisions without using the "army general" to issue total commands is extremely tricky. Our line started to splinter right away as the two divisions rolled different numbers of moves.
I still really dig Hail Caesar, even when I lose. As we get a greater variety and number of figures on the table more interesting tactical options and challenges crop up. Looking forward to our next game!