Showing posts with label Painting. Show all posts

Saturday, August 10, 2013

Painting Reaper Bones for Newbies: Skeletons


Did you get your Reaper Bones shipment? Do you suddenly have hundreds of miniatures beckoning to be painted? I've seen a huge upswing in the number of new painters who have jumped into the hobby with the Bones kickstarter which is great, but I can see how tackling a project like this could be a little intimidating for folks new to the hobby. Since I'd be working on painting up my own Vampire package of Bones, I thought I'd share my thoughts and tips for anyone working their way through the mountain of plastic Reaper delivered to us.

I'm getting started with the Skeleton warband. My tips for getting started painting Reaper Bones after the jump.
Previous Articles: I've already written up a few articles about painting Reaper Bones. You might want to check out:

Planning the Project

There are a lot of miniatures in that Reaper box. Instead of painting them up one at a time, I'm using a technique I learned to employ went painting up massive amounts of figures for the various army size wargames I play. To make the project more manageable I broke the figures down into subsets, the first set to tackle being the skeletons.

For new painters, the skeletons are perfect. Check it out, you only need a handful of paints for this project:

I've linked to some paints by Vallejo and Reaper (my preferred brands), but Games Workshop, Foundry, Coat d'Arms, and even craft paints (in a pinch) will work. Just look for water based acrylics.

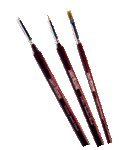
I used cheap hobby brushes from craft stores for decades before finally upgrading to Army Painter and Winsor & Newton this year. Those dedicated brushes are awesome, but I'm sure they can appear pricey to someone just getting started, but they are worth it.

You'll also want a hobby knife. I'm not going to cover basing in this post, but if you are making a run to the hobby store to stock up on supplies keep an eye out for static grass and either basing material or sand (available from hardware stores, pet shops and coastlines. Be sure to clean it!)

Prepping the Figures

It's not the most fun part of figure painting but it needs to be done. Look carefully all over the figure for mold lines, thin ridges of material that typically run vertically around the edge of the figure. Use your hobby knife to slice those mold lines off. Be careful, it's easy to hack too much off and lose detail or slice into your thumb! If you miss a few mold lines, relax. We aren't entering these into a competition, I'm sure the painting police will forgive a few errant mold lines.

For normal plastic or metal figures I'd suggest priming them next, but Bones don't seem to need primer. Give them a good scrub in warm, soapy water to remove mold release grease so the paint will adhere better.

Finally, you probably have some Bones that were bent out of shape. A quick dip for 15 seconds in boiling water and then a bath in ice water allows you to reshape the figure to its original sculpt.

Painting

Finally! We get to the fun part. We're going to work through several phases: Base Coat, Ink Wash, Highlights, and Detailing.

First up is the base coat. That's simply putting a solid block of color on each unpainted surface of the model. For these skeletons I chose three simple colors: bonewhite for the skeleton's bones, leather brown for the bows, quivers, straps, backs and rims of shields, and sword handles, and black for the sword and spear points as well as the fronts of the shields.

If using a dropper bottle, put a few drops of paint on a palette. If it's thick and clumpy (like toothpaste) add a drop of water. If it seems thin and watery and not the shade of paint you expected (grayish pink instead of red for example), the paint may not be properly mixed. Give it a good shake until it is thoroughly mixed.


Thin paint is better than thick paint. With a single coat of thin brown paint on the figure's quiver, it doesn't cover completely. The paint settles into crevices and seeps away from ridges. That's ok. We're going to use an ink wash later to create a similar effect, but for now we can just give this area a second thin coat of paint for better coverage.


Once the base coat is done, double check that you didn't miss anything (arm pits, behind shields, etc.)

The Ink Wash

Next we'll be inking the figure. The base coat gives color to the figure, but the ink wash will help give definition. The ink is very thin, it seeps into crevices (simulating shadow) and seeps off high points (mimicking highlights).

Once the base coat is dry, put a drop or two of brown ink on your palette, add a drop or two of water (you can always apply a second or third wash if the first is too thin), and give all of the bonewhite and brown areas a dose of the brown ink.


Check out the darker areas created between the skeleton's toes, ribs, ulna, eye sockets, etc. I went back and reapplied a drop of brown ink to the figures eye sockets, and a few areas I wanted to stand out a bit more. The ink wash also picks out the wood grain on the spear shaft, the arrows in the quiver and other equipment.

Painting Highlights

Once the ink wash was dry I moved on to highlights. Although the ink wash slides off the raised areas of the figure, it still tints the original base coat. To make sure the figure "popped", I got out the original bonewhite and applied just a bit of color (sometimes just a single dot or stroke) to the prominent areas of the skeleton that would catch the light:

  • Top of the skull
  • the brows above each eye
  • collarbones
  • a single stroke on each large limb bone (humerus, ulna, femur)
  • kneecap
  • shoulder blades
  • hip ridges
  • a series of dots down the spine
  • dots on some finger and foot bones 

Finally, I used pure white to pick out the skeleton's teeth. If you haven't painted tiny objects before, this can seem a bit intimidating. Don't worry, we are just trying to suggest the play of light over the figure. If you stand two inches from a painting by a Renaissance master you are going to see the individual paint strokes and the blobs of pigment, but step back a few feet and those imperfections disappear as you take in the whole scene. We're going for "table standard", a paint job that looks good in use as a game piece rather than an art piece for a painting competition.

Final Details

The metal bits painted black (spear points, sword blades) should get a few strokes of gunmetal silver. I usually paint along the edges of the weapon to highlight their deadly cutting edge, leaving a bit of black towards the center of the blade. 

I mixed my black and white paints into a dark gray and painted the center of the shield to highlight it. The central boss would be metal and got a bit of gunmetal too.

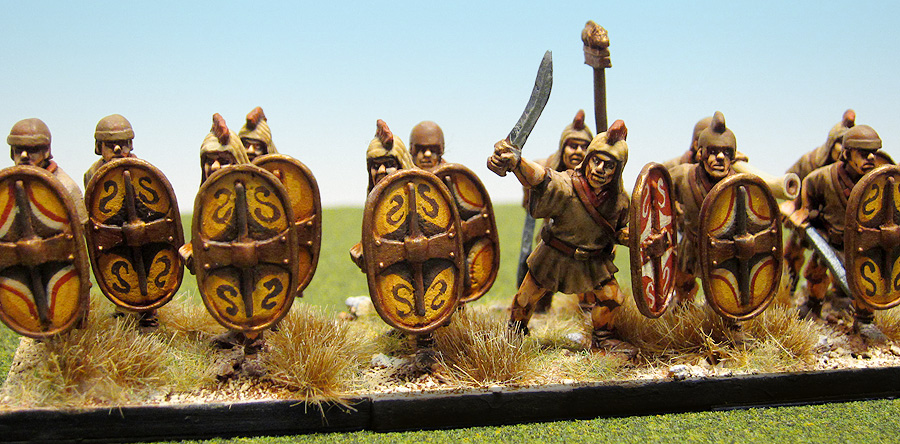
The shields are a place you can get pretty creative. A number of vendors sell generic decals that could be applied to the shield face, or you could give the shields a coat of color, but I decided to try my hand at some Greek-like designs to suggest these skeletons hail from a civilization predating the typical medieval European fantasy setting.


Hand painting shields is tricky, but all I did was look up some designs on Google and paint them in white, using black to go back and refine mistakes. I could have spent quite a long time on these but I knew I'd be making them look aged and just wanted a suggestion of a design.

I mixed up some brown, sand yellow and bonewhite and gave a light, scrubby drybrush over the edge and bottom half of the shield to simulate layers of dust accumulated during the skeletons' long slumber.

Basing and Finish

I glued each figure to a 1" metal washer, glued sand to the base, gave the whole thing a coat of brown highlighted with sand yellow and bonewhite and finally a few tufts of static grass and I was done!


And that's it! These are simple figures, and some of the detail is a little shallow, but even with a simple paint job they turn out nicely. I'm going to keep posting my progress on these Reaper Bones, and I'd love to see how you tackle the same figures. Let me know if you paint up your own skeletons :)

Thursday, July 11, 2013

Testing Techniques for Painting Horses


Oh horses, why do you vex me so? I've found cavalry to be an essential branch of the ancient and medieval armies I'm painting up. They typically have dynamic movement capabilities and impressive combat stats in game, and a large mass of cavalry figures looks impressive. But I still can't find any enthusiasm for painting up that much horse flesh.

In an effort to determine the quickest way of painting up mounted troops, I tried out three different techniques on some Conquest Miniatures Norman cavalry. Painting to wargame standard, I wanted to compare the final product with regards to the time and effort required to complete the paint job. My horses after the jump.

The horse blankets and straps haven't been finished, and some of the subtleties of the shading are lost in these photos (I'm really looking forward to getting into the new house with it's proper studio lighting), but hopefully there's enough detail to discern differences between the three techniques.

3 Color Steps 


This is a standard painting technique that's become associated with it's most proficient practitioner, Kevin Dallimore. I started with a dark base color, and then worked up two shades of highlights on the raised surfaces. I'm still finding my way around horse musculature in order to pick out the muscle definitions, but I was fairly pleased with the results. I followed the colors suggested in the Wargames Soldiers and Strategy article in issue #66. Trying to create my own three step shades was difficult. If the jump in color from one highlight to the next is too great the result looks stark and unnatural.

Effort: Challenging
Time: Several painting sessions
Result: Good

Oil Wipe 


This is an easy technique I read about online, but requires quite a bit of patience. The horse is given a relatively light base coat with your standard water based acrylics (Vallejo, GW, etc.). Once dry, the figure is slathered with a darker oil based color, which is then wiped off with a towel. To get to tricky parts (the inner leg for example), I used a q-tip to navigate into hard to reach areas. The darker oil paint is removed from the raised surfaces, and the wiping process tends to create a subtle gradation from highlight to darker recesses where the towel or q-tip can't reach. The oil paint takes a long time to dry though. I believe these horses took a week before they were no longer leaving a residue when touched. I really like the effect on dark horses, but I haven't risked doing lighter dun, gray or white coats yet.

Effort: Easy
Time: 1 painting session, 1 week drying
Result: Fair

Army Painter Dip 


For the dun horses I tried the dip method using Army Painter Soft Tone . I gave the horses a base coat of yellow / tan, and brushed on the Army Painter dip. When using Army Painter on humans, I'll often go back and pick out a few highlights, but for these horses I wanted to see how they turned out with just the dip technique. The dip works best with plenty of deep crevices and fine detail, and I think it got a little muddy and pooled on the larger surfaces areas of the figures flanks. Still, it gives some shading and requires very little effort.

Effort: Easy
Time: 1 painting session, 1 day drying
Result: Acceptable


Results


A shot of the large flank areas, of the (L to R) oil wipe, three step, and dip methods.  


I'm glad I undertook this exercise. For show pieces or commanders, I think the 3 step process gives the most amount of control, and can be further expanded into four, five or more steps to capture some truly dynamic or subtle shading.

For the rank and file though, I didn't find the three step process produced a notable improvement over the other two techniques. The Army Painter dip is quick, but I think it needs a layer of highlights to avoid a dingy final product.

The oil wiping technique takes quite a long time to cure, but the ease of applying it and the results make it the clear choice for pumping out tons of cavalry.

Hope you found this helpful. With the horses done, I'm on to the riders next. I might even get them done before Historicon. :)


Saturday, May 18, 2013

I Need Miniature Paint Brush Recommendations

I've been painting miniatures for a long time, but never paid much heed to the brushes I used. Paint, figures, even basing material and terrain all received my careful attention, but I became accustomed to picking up some cheap brushes from the local arts & craft store and replacing them once they lost their tip (typically within a month or two).

Last year I picked up an Army Painter Brush Set and was surprised at what a difference using a dedicated set of miniature painting brushes made.  The Army Painter set included a "Standard Hobby Brush" which I assume is size 1, and a smaller "Hobby Detail Brush" (size 0?) and a flat tipped "Drybrush" brush. The Standard Hobby Brush became my work horse, with the Detail Brush helping out with facial highlights, edge highlights, piping and shield patterns. After a year of use (far better than my usual cheapy brushes) the Army Painter "Standard Brush" is kaput, its tip frayed and splayed. It's time for a replacement.

Coincidentally, Monty at Twin Cities Gamer happened to mention how happy he was with his brushes. I was all set to pick up his favorites, a Raphael Kolinsky Sable size 0 and Raphael Kolinsky Sable size 1 when I read a comment to his post suggesting a Winsor & Newton Series 7 Kolinsky Sable size 0 and Winsor & Newton Series 7 Kolinsky Sable size 1. I'd heard of Winsor & Newton from miniature painters before, but really hadn't put much thought or research into them.

So fellow painters, what do you recommend?

Saturday, December 29, 2012

28mm Ancient Iberians by Crusader Miniatures

Crusader Miniatures 28mm Ancient Spanish

After the trouncing my gauls received in my last Hail Caesar game, I decided it was time to reinforce them with some of the allies I had atop the lead pile. I'm aiming for a full Carthaginian army to oppose a Republican enemy, but with my interests ping ponging between periods, this Punic Wars project is going to take a few years to complete. Take a look at the color scheme I worked out for my ancient Spanish after the jump.


Planning an Army Color Scheme

For the Romans I know I want to stick to the classic red as a unifying color, with linen white and earth tones and I have a general idea of what I'd like the Carthaginian side of the table to look like. Hannibal's army is made up of a range of tribes, warbands and mercenaries picked up as he marched his invasion force from Africa through Spain, France, into the Italian peninsula. With such a wide variety of soldiers, it would be easy to paint each ethnic group with a variety of colors, but I feared the overall effect would be garish. By restricting my color palette for each group I'm hoping that each mercenary unit appears distinct, making the Carthaginians look like the amalgam of numerous tribes and groups that it was. If each group used a similar rainbow color palette, I think the overall effect would be of a unified army of clowns. Definitely not what I am going for.

I've already knocked off quite a few units of Gauls (with some ancient Germans acting as stand ins). They've received the most colorful tones, wearing their hallmark plaids of blue, green, yellow and red. I intend to paint the Carthaginians in white linen with accents of black and red. I've also started some Numidians using muted earth tones: off white tunics against warm brown Berber skin tones. Before starting the Spanish I pulled together some of my favorite images to construct a color palette.

Angus McBride's Ancient Iberians 

I really like Angus McBride's ancient Spanish. The warm skin tones, muted browns, chocolates and mustards stood out to me because of their tight monochromatic color scheme. These aren't eye popping troops, but will make the colorful Gauls and high contrast Carthos stand out even more by providing a muted color counterbalance.
I selected a number of representative colors from each plate to build my Spanish color scheme.

 
TunicVallejo Khaki 72061
Baldric Should SlingVallejo Beasty Brown 72043
BeltVallejo Red Leather 70818
HelmetVallejo Beasty Brown 72043
HeaddressVallejo Dark Sand 70847 and Red Leather
ShieldAmericana Spicy Mustard and Vallejo Leather Brown 70871

Crusader Miniatures Ancient Spanish 


I really like the solid, detailed sculpts of Crusader Miniatures. These figures are armed with the iconic Spanish falcata sword and scutari shields. Hannibal's Spanish mercenaries served him as solid heavy infantry, and the rows of similar poses, brutal swords and large shields should provide a nice mirror of their Roman heavy infantry opponents.

"I pity the fool who makes fun of my mohawk toupee"

The Crusader sculpts painted up quickly and easily. I hand painted the shields with a common mustard yellow base copied from the Angus McBride plate, but modified for the cramped space of the Crusader shield with boss. I really enjoyed painting these ancient Iberians up. I'm already planning on picking up some more packs for a second unit, and maybe a few Celtiberians too. And some cavalry. Heck, maybe I should just do a Spanish army instead of a Carthaginian one.

I'm never going to finish this project, am I?

Saturday, September 1, 2012

Dark Ages Color Palettes


I've been noodling the idea of starting the Dark Ages / Norman Conquest / Normans in Italy / 1st Crusade period, but since it's on the back burner I'm taking my time and planning out how I want to tackle Yet Another Period. I read some really good posts on Model Dad's blog about dark ages dying techniques and color schemes. Using that as a base, I've decided to work out the color schemes for the various armies I might be painting up for my 10th - 12th century Normans, Anglo-Saxons and Vikings. This is a pretty massive post where I go into historic dyes, hobby paint equivelants, color schemes, and samples. All this and more after the jump.


Fabric Colors of the Anglo Saxon World

I've just started researching Dark Ages color schemes, but I've found Jenny Dean's website a great resource (thanks to Model Dad for pointing me there). Jenny has a number of posts dedicated to Anglo Saxon dying techniques. Along with descriptions of her dying methods and examples of her experimental results, she also drops cool tidbits like this:

"The analysis of dyes in textiles of the early Anglo-Saxon period seems to indicate that reds, like purples, were mainly used for narrow woven bands, headdresses, embroideries and accessories, such  bags, rather than for larger fabrics. Where dyes were used in larger fabrics (and dyes were detected in only one-third of the larger fabrics analysed) these were mainly dyes that give shades of yellow, blue and brown, plus green from blue and yellow dyes used in combination. It is also possible that, at least in the early Anglo-Saxon period, reds and purples were colours reserved for people of high status."

Ms. Dean seems pretty reliable regarding natural dying techniques of early Britain, so I'm going to assume her description of colors and their frequency in the archeological record is accurate. This gives me a good place to start for planning out color schemes (dyed textile images from Jenny Dean's site).


Common Colors(60% of cloth)
Undyed Fabric in Off-white, Gray, Tan, and Brown


Uncommon Colors (30% of cloth)
Yellow, Blue, Brown, and Green

Rare Colors (10% of cloth)
Red, Purple
I had read a bit of wargamer wisdom that said the color green was not available as a dye color during the dark ages, but based on the examples above I feel confident that nearly every color of the rainbow could be produced during the 11th and 12th centuries, and only the saturation and frequency of various shades need to be adjusted on our figures to recreate accurate clothing.

Historically Accurate Hobby Paints

With these Anglo Saxon color samples as my guide, I've tried to find suitable color matches in the Vallejo and Games Workshops line of paints. I'm working from images from the web, and comparing them to the paint samples from the two manufacturers, so I can't promise an exact correlation, but hopefully it's good enough for the tabletop. The Games Workshop colors appear to be more vibrant on the whole, so many of these GW colors would probably need to be desaturated by adding some white or brown to the shade.


Sample Vallejo Games Workshop
Common Colors
883 Silver Gray Rakarth Flesh
918 Ivory Ushabti Bone
837 Sand Light Karak Stone
916 Sand Yellow Zamezi Desert
877 Goldbrown Balor Brown
876 Brown Sand Mournfang Brown
Uncommon Colors
953 Flat Yellow Tau Light Ochre
915 Deep Yellow Yriel Yellow
961 Olive Green Loren Forest
833 German Camouflage Caliban Greent
907 Pale Greyblue Celestra Gray
963 Medium Blue Kantor Blue
Rare Colors
959 Purple Xereus Purple
817 Scarlet Wazdaka Red
911 Light Orange Jokaero Orange

Creating Color Palettes for Dark Ages Armies

Now that I've narrowed down the colors I'll be using for my dark ages figures, I've combined them into a few color palettes.  Although information about warfare during this time is limited, it's unlikely vikings, normans and anglo saxons adhered to any sort of uniform, each man providing his own gear, painted and dyed to his own taste.

On the wargame table though, I find treating each figure as an individual turns the board into a visual mess. My goal was to create a color palette for each army that would visually tie them together, without implying that they were wearing uniforms or livery. I wanted these color palettes to be fairly generic so I could assign them to armies at a later date, so I've gone with four simple color themes based on the seasons of the year.

The common colors will appear most prevalently within each army. One or two uncommon colors may appear as well, with the rare complimentary colors reserved for decorative items and borders on elite figures.

Winter
883 Silver Gray 918 Ivory907 Pale Greyblue963 Medium Blue916 Sand Yellow
Rakarth FleshUshabti BoneCelestra GrayKantor BlueZamezi Desert

Spring
918 Ivory 837 Sand Light915 Deep Yellow961 Olive Green959 Purple
Ushabti BoneKarak StoneYriel YellowLoren ForestXereus Purple

Summer
916 Sand Yellow918 Ivory961 Olive Green833 German Camouflage817 Scarlet
Zamezi DesertUshabti BoneLoren ForestCaliban GreentWazdaka Red

Autumn
877 Goldbrown918 Ivory876 Brown Sand953 Flat Yellow911 Light Orange817 Scarlet
Balor BrownUshabti BoneMournfang BrownTau Light OchreJokaero OrangeWazdaka Red


Painted Examples of Viking Bondi

I'm hoping to start playing SAGA this winter starting with viking and norman warbands. I painted up a few 28mm bondi from Wargames Factory's "Vikings" as samples to see if this technique would work.  When I think of vikings one of the first images that comes to mind is the viking longship with its striking red and white striped sail. 

I decided to assign my autumn color scheme to any vikings I paint up, with particular emphasis on ivory and a rusty red color. The bondi were viking farmers, and unlike the more heavily armored huscarls, the bondi are wearing simple tunics and breeches providing a good range of fabrics to paint up. As lower class warriors, they shouldn't have a large amount of the rare red fabric, but I made sure to include at least one bit of red on each. A red cap on one, but only a simple belt or pouch on the others with some red being incorporated into the simple geometric designs of their shields. I also included a bit of ivory in various tunic borders as well, using the two "team colors" to tie the whole army together.

Viking bondi from Wargames Factory
I still need to paint up more vikings and some opposing normans in a different color scheme, but already I'm happy with the result. By forcing myself to limit the color palette and pay attention to how I could incorporate the ivory and rust red colors I think the end result should appear suitably archaic but with enough pops of color to add visual interest to the game.

Buying Dark Age Vallejo Paints Online 

The paints above are available from your FLGS, but my FLGS is pretty lackluster and constantly seem to be out of stock. I tend to order more frequently from Amazon and The War Store and a number of the paints mentioned above are available there:

918 IvoryVallejo Model Colors: Ivory #5
883 Silver Gray Silver Grey
916 Sand YellowSand Yellow
877 GoldbrownVallejo Model Colors: GoldBrown #126
876 Brown SandBrown Sand
963 Medium BlueVallejo Model Colors: Medium Blue #57
953 Flat YellowFlat Yellow
961 Olive GreenVallejo Model Colors: Olive Green #82
817 ScarletScarlet
959 PurplePurple
911 Light OrangeVallejo Model Colors: Light Orange #22

There are also a few paint sets that offer a good place to start if you need to pick up more than a few bottles of paint to add to your collection.

Panzer Aces Wood & Leather
The Vallejo Wood and Leather set contains a variety of earth tones, a great place to start for the common colors that appear in dark age armies.

The Vallejo Earth Tones set  looks like it provides a good initial set of muted natural colors too.

Amazon's Vallejo Game Colors Paint Set: Undead
The War Store's Vallejo Game Colors Paint Set: Undead
The undead set comes with a metallic silver and bronze, white and black as well as a shade of red, parchment, purple and violet. Along with a few individual bottles of earth tones, this seems like a good basis for a generic dark ages color palette.