I've been upgrading my terrain scenics lately: woods, buildings, walls and other items that sit on top of the table, but I've been holding out on updating the terrain board or cloth that our miniature wargames are played on. I toyed with the idea of creating terrain boards, but after seeing some impressive terrain cloth tutorials (Of Metal Men's, Jeff Knudsen's Terrain Cloth and Balagan's Felt Cloth for example), I decided to tackle one myself as part of my Flocktober projects. Hurricane Sandy and Fall-In delayed completion, but pics and a tutorial after the jump.
I was wary of jumping right into a costly "rolling farmland" flocked terrain cloth without a little experience under my belt. I have some sci fi games I wanted to dust off and figured I could use a desert wasteland terrain cloth for them. Plus, sand is cheaper than grass flock.
Materials
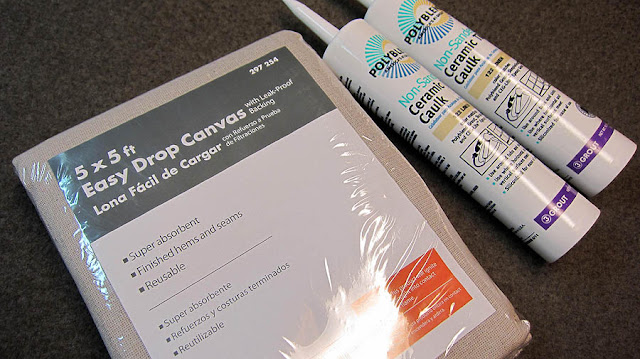
I used the paint shades suggested in Quindia Studios awesome desert terrain board tutorial, namely Scorched Brown, Bestial Brown, Bleached Bone and gray. As described in the Quindia Studios article I brought in paint samples to the local DIY store which they matched then and provided water based acrylics in "sample" pints. Very easy and very cheap.I also picked up a 5'x5' canvas dropcloth and some bathtub calk in various shades of brown, tan and cream. I had to resupply during this project, so here's a full list of the materials I ended up using:
- 1 canvas drop cloth ($7)
- 5 pints of paint ($2.50 each)
- 4 tubes of calk ($6 each)
- 1/3 bag of sand
- calk gun, wide paint brushes, palette knife, mixing tray and gray paint I had on hand.
Initial Terrain Cloth Sand Base
I spread the cloth on my work table and got to the business of spreading the tan calk and smearing it into a thin layer with a palette knife (I later switched to using my finger for tricky spots which seemed to work better).I sprinkled the wet calk with sand and then used one of the other calk tubes as a rolling pin to smooth out the sand and make sure it had a firm bond with the calk.
After the entire table was covered in sand and calk, I waited for it to dry overnight before removing all excess sand.
 |
| Completed sand layer |
Painting the Terrain Cloth
Next I used a heavy layer of scorched earth and bubonic brown as the base paint, mixing and blending colored patches to give the terrain cloth a natural variation. At one point I was running low on paint and began using a diluted solution of paint and water as a "wash", which looked great even when dry, but wound up not providing the extra fixing strength that a proper coat of paint did. I wound up going back and giving a few coats of paint to the entire cloth to ensure full coverage and to get into tricky area.
 |
| Base coat of scorched earth and bubonic brown. |
I tried a number of different calk colors, including a lighter tan calk to match the light sand color I had in mind for the table, but this ended up being a poor choice. I thought a dark brown would look too "wet" for an arid cloth if it showed up where the sand had worn off, but the light tan calk I chose really draws the eye when it peeks through crevices in the sand. If I did this again I'd stick with a dark brown calk for the entire mat.
Drybrushing
After allowing the base to color to dry and went back and drybrushed with various shades of bubonic brown, gray and bleached bone. |
| Beginning the gray drybrush on the left side. |
 |
| Completed drybrush |
 |
| Overhead view with a few test pieces to show scale. |
I'm happy with the final terrain cloth and looking forward to getting some games played on it. Placing foam hills beneath the cloth allows it to fold and bend into realistic hill contours. We already put it to use with our Halloween game just before it was completed and it worked really well. One word of warning, the amount of sand and calk on this table makes it heavier than I expected. I fear a larger 9x5 cloth is going to be a pain to move by one person if it uses the same sand and calk method as described above.
There are a few other additional terrain pieces I'd like to make to match this terrain cloth such as the rock formations in these tutorials: Chicago Wargamers Rock Formations and Baueda's Desert Terrain tutorial


0 comments:
Post a Comment